January 14, 2015

Sea Shell Flowers

Seashell Flower artwork


Seashell flowers


Supplies
Wooden picture frame
Canvas (Choose a size that will fit inside the frame)
Ceramcoat acrylic paint
Bristled paint brush
Tacky glue
Sand
Cardboard
Glazed shells
Tiny faux pearls
Starfish

     First, the flowers. These took a lot of trial and error! The key to keeping them sturdy is using a small piece of cardboard, around the size of a quarter, to anchor the shells. Cut these circles out and use them as a base when you begin constructing the flowers. Sort out shells that are the same type and of various sizes. The larger sizes are used for the first layer and the smaller ones for the second, inner layer. One by one use tacky glue to secure the sea shells to the cardboard. Let the first layer completely dry before constructing the second layer. (Hint: Tacky glue can take about a minute to bind stronger. Hold each "petal" in place until it feels secure, they start to droop if you work too quickly) Once the flowers are constructed, decorate the centers with small shells or tiny faux pearls.
     Now you need a way to showcase your artwork! Take a wooden picture frame and remove the glass and backing. Using the bristled paint brush, paint the frame with two coats of acrylic paint. The bristles on the brush give a nice texture to the finish. Let dry.
     Choose a thin blank, white canvas that will fit in the frame where the backing was previously secured. With the bristled paint brush put a thin coat of tacky glue across the canvas and cover with sand. Important: Make sure you cover your workplace with newspaper to avoid a mess! Gently tap excess sand off the canvas and let dry for at least 30-45 minutes. Once completelydry, apply a second thin coat of Tacky glue and repeat. This gives you a great backdrop for your flowers!
     Secure the canvas into the frame with the fasteners in back. Now you are ready to arrange the flowers! Once the design is to your liking, use Tacky glue to affix each flower to the canvas. The cardboard behind each flower gives you an easy surface to spread the glue. Finally, I used two bleached starfish that I had purchased from a shell shop to complement my flowers!


My inspiration

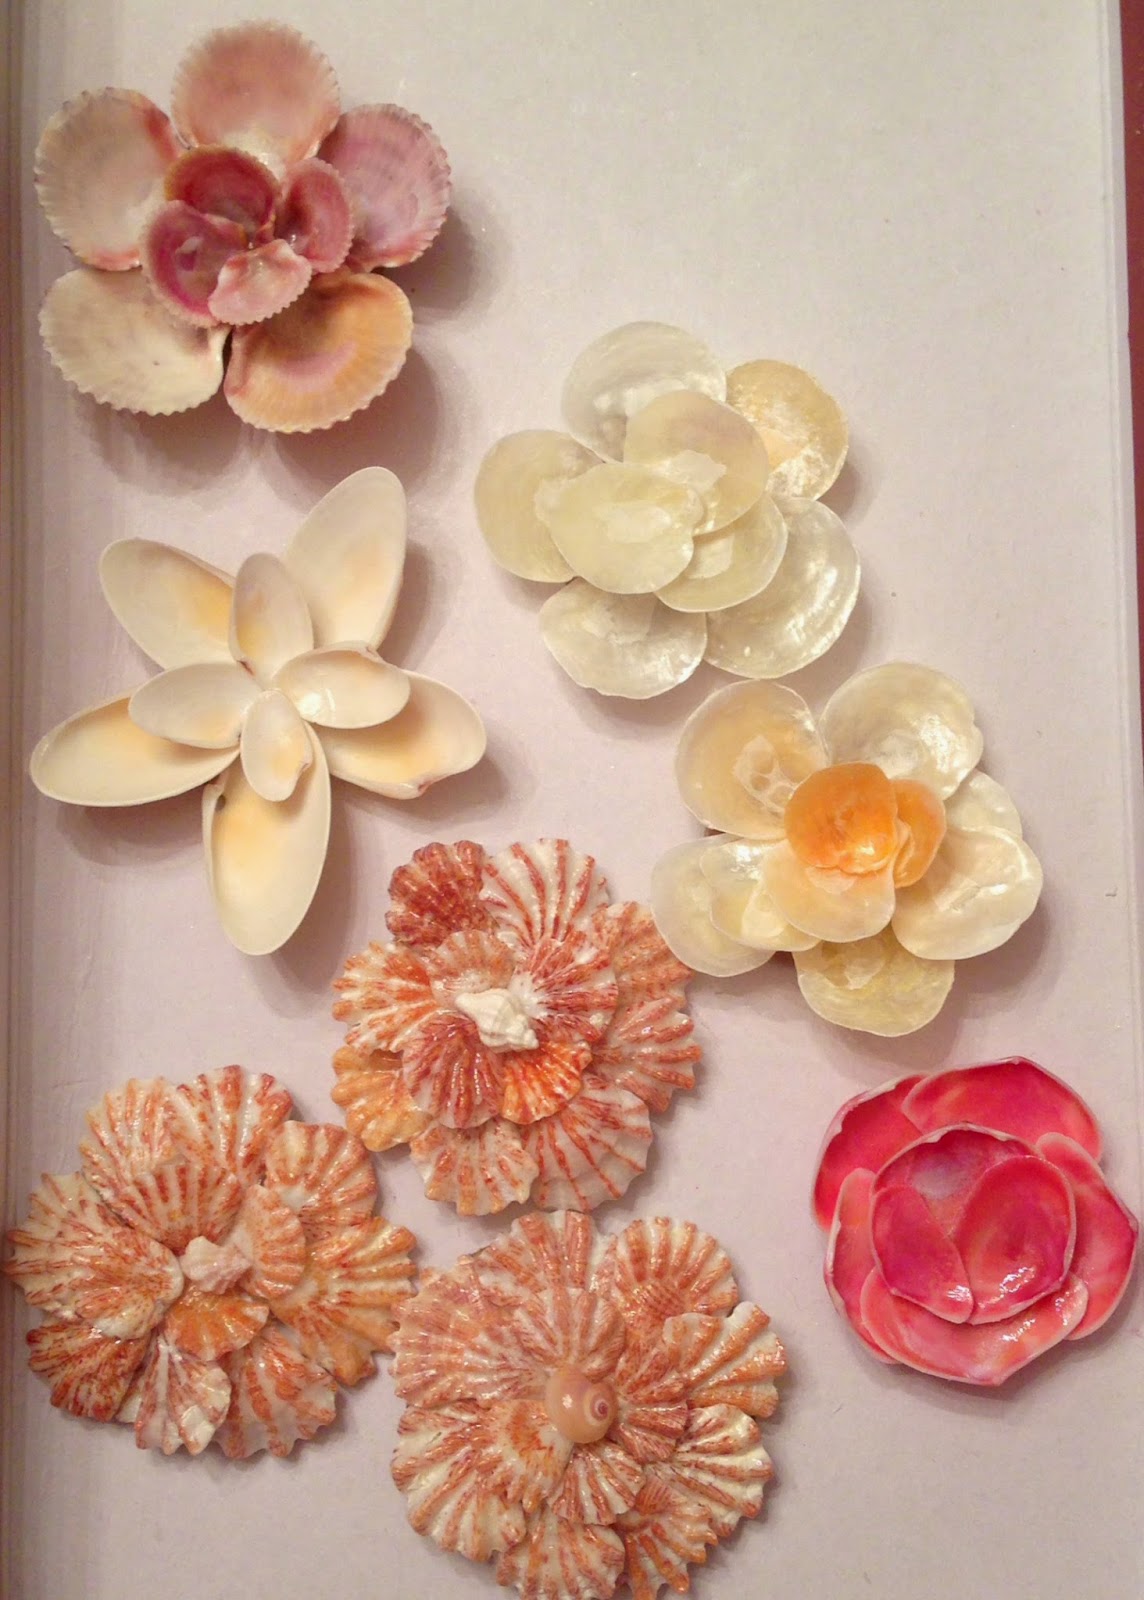
In March, I attended the 34th Annual Marco Island Shell Show, presented by the Marco Shell Club. I was amazed by the artwork showcased here!! The creativity, execution and craftsmanship were superb. These women (&men!) are experts. Below are flowers that I used as inspiration for my crafting. I can only hope that one day my artwork will be at the level of these professionals!

How adorable is this garden scene?!


January 2, 2015

Organization Tip

Organizing your seashells

Up until a couple weeks ago all my sea shells were thrown into a shoe box with very little organization. Then I came up with a great idea I wanted to share! I bought a Bead Organizer, which happens to double as a great Sea shell organizer. Now my sea shells are sorted based on type and they are easily accessible for crafting! It's the little things :)

Wine Cork Boards

 You have a lot of flexibility when it comes to deciding on a pattern. Paired with a bottle of wine, these make a great gift!
Cork board created from wine corks


Supplies
Open Back Frame (The type used for framing canvases)
Hot glue gun
Large piece of cardboard
Wine Corks (Must be made of real cork! Not synthetic cork, like those found in Barefoot)
Serrated knife
Wire
    You can purchase a sheet of cardboard or be resourceful and use cardboard from a UPS shipping box! Cut out a rectangle large enough to cover the opening in the back of the frame. This will you give you something to glue the corks too. Use hot glue to affix cardboard edges to the back of the frame. Make sure the side facing the front of the frame is brown so that it won't be noticeable through any gaps in the corks.
     Now you need to decide on the pattern you would like to create! For the brown frame, I used a serrated knife to cut the corks in half and incorporated the ends into my pattern. Some wineries have designs on the tops and bottoms of their corks so this is a good way to showcase this!  I never had any issues with the corks crumbling on me when cutting them. I have seen tips on boiling/steaming wine corks to prevent crumbling, so you can try this if you run into problems. (Hint: Not every wine cork is equal. You will notice that some are shorter and some are longer. Try to group similar sizes together, this will keep you from having odd gaps between the corks if they are not the same length) I used two champagne corks in the white frame. They are a good way to cover a lot of space if you find yourself with a big gap.
     Once you have a premise for the pattern you can begin hot gluing. You may get to the end of a row of column and the final corks do not fit! This was very frustrating for me!! To solve this problem I shaved off a few centimeters on the preceding corks with a serrated knife until they were at a length where they fit inside the frame.
     To hang the cork board, most frames have rings mounted on the back, through which you can thread a wire. These boards look great as is, but if you want to make them functional see below for directions on how to craft some fun pins!
Note: When browsing the internet, I came across a few sets of instructions that recommended against the use of hot glue because the corks may pop off. So far I have found no problems with the corks adhering with the hot glue! I will update you with any changes :)


Sea Glass Thumb Tacks


Wine cork board with sea glass thumb tacks

Supplies
Sea glass
Hot glue

This is such an easy and creative way to spruce up some regular old thumb tacks. And they are a great addition to your wine cork board! Simply hot glue the sea glass pieces to plain thumb tacks and let the glue set. You can also use small sea shells instead of sea glass!


Happy Crafting!

Creative way to showcase wine cork collection
A cute way to showcase your wine cork collection!


December 22, 2014

Holiday Edition

Beach Vacation Ornament

Seashells bucket Christmas ornament

Supplies:
Miniature pail
Styrofoam sphere (choose a size that fits inside the pail)
Glazed sea shells ("How to")
Tacky glue
Nautical ribbon
Twine
Decorative button

This is a great ornament to commemorate a beach vacation you took over the past year! First, glue the Styrofoam ball inside the bucket with Tacky glue (I used a 5 cm sphere), this gives you a base to glue the shells on. Then glue the glazed shells into place; I layered them on top of each other so that no Styrofoam was showing. Now you can decorate the bucket! I found this button at Marco Shell & Craft Co and strung it around the bucket with twine. Then I tied ribbon onto the bucket handle; I love this sea creatures print! Hang the pail on a tree branch by its handle. Don't forget to write the year and/or location on the bottom of the bucket so you will remember this vacation when you trim the tree for years to come!

Cork Tree

After sea shells, wine corks are my second favorite material to craft with! But you don't need to drink this many bottles of wine before you can start your project! I asked friends and coworkers for corks. I also went to wine tastings at local wineries to ask for their extras. While out in Fresno, California I hit the jackpot and brought back an entire bag from Engelmann Cellars and LoMac Winery! You'll notice these corks in the picture below.

Wine cork Christmas tree

Supplies:
Styrofoam cone (8 x 3 inch)
Low temperature hot glue gun
Wine Corks (I used about 75 corks total)
Short strand of battery-operated lights (20 count LED)
Miniature tree topper

Some supplies pictured

Mount the lights around the Styrofoam cone with pins. Start at the top of the cone and pin in a spiral all the way to the bottom, with the battery-pack at the end. This will keep the lights in place until corks are positioned. You won't see the pins once they are covered by corks. [Hint: I used straight pins that have a small ball on the end (I tried regular straight pins at first but the wire would slip right off). My strand of lights was made up of three wires twisted around each other. I placed a pin every 1-2 inches in between the twisted wires. Make sure you don't pierce the wire!]
Glue the tree topper on top of the cone with hot glue, I found this one at Michael's.
Now you can start gluing the corks. Hot glue can eat away at Styrofoam, so make sure you are using a low temperature hot glue gun. Note in the picture that I glued a row of vertical corks around the base of the cone to give the tree an level base to sit on. After this row I became more sporadic with where I glued the rest. Make sure you allow the lights to poke through between the corks. 
Finally, put some batteries in and watch it glow!


December 19, 2014

Sea Shell Letters


Initial Sea Shell Letter


Initial seashell letter

Supplies:
Cardboard Letter
Ceramcoat acrylic paint
Glazed shells  ("How to")
Tacky glue

For this Initial letter, I found a large, hollow cardboard letter. This letter has good depth so it can stand up on a desk or shelf on its own. I painted the entire letter with two coats of tan acrylic paint. I arranged my shells before gluing them down to give myself an idea of the overall look I was going for. This is where having a variety of shapes and sizes works to your advantage, because you can get a 3D effect by layering!

Nautical Phrase

Nautical phrase seashell letters

Supplies:
Wooden letters
Ceramcoat acrylic paint
Glazed shells ("How to")
Tacky glue
Twine

The beauty of these nautical letters, is you can chose many combinations to make unique phrases! Other suggestions are SEA, LAKE, your favorite beach town or someone's name. For this project, I used smaller wooden letters that I found at Michael's. These don't stand up on their own. I have mine leaning against the wall on a book shelf, or you could mount them on nails. I painted each with two coats of light blue acrylic paint. There was an edge around the outline of each letter, which I used to my advantage. I affixed twine to the edge with Tacky glue. [Hint: When gluing the twine outline you have to take each section a couple inches at a time. I would hold each section down for about 2 minutes until the glue started to adhere stronger. If you go too fast it will come right off!] I then glued the glazed shells to the bottom of each letter with Tacky glue.

Close up detail of seashell letters
Close-up of detail

Fun tips
I glued some shells upside down, because the inside of the shell was a beautiful color while the top was plain white. I think it adds some variety to the design!
I added pieces of weathered coral I found to add some contrast, seen above.

Sea Shell Crafting for Beginners

Here are my tips on crafting with sea shells:

1. When shelling NEVER take live shells. When browsing the beaches you will find many beautiful shells, but when you look inside someone is still home! It is illegal to take live shells, starfish and sand dollars. So first and foremost, make sure all shells you are taking are empty!

2. Know your tides! The best shelling is at the beginning of low tide, when the shells aren't covered by waves and before the other shellers get to the best ones! If you have the opportunity to go after a big storm has churned up the ocean, you won't be disappointed! The large waves bring great shells to shore (maybe even some deep-sea shells!)

3. Clean shells with a 1:1 mixture of bleach and water overnight. This will take the fishy, ocean smell away and leave you with nice, neutral smelling shells. Rinse them with water after taking them out of the bleach mixture and you're good to go!

4. Glaze your shells, this will give them that nice shine like they just came out of the ocean. I like Triple Thick Gloss Glaze. I apply it using a foam paint brush, then let them dry on wax paper.

5. Use Tacky Glue to glue shells for your projects rather than hot glue. It takes a little longer to adhere at first, but it creates a very strong bond and dries clear. 

6. Sand dollars are very fragile, so you have to harden them before using them for projects. I used a 50/50 mixture of white Elmer's glue and water. Brush it on in a thin coat with a small bristled paintbrush. After the first coat completely dries, do a second coat. This will not only harden the dollars but make them appear whiter.

25.9406° N, 81.7147° W

Sun setting into the Gulf Ocean on Residents Beach
Sun setting into the Gulf

This is my little piece of paradise, Marco Island Florida. Located on the Gulf of Mexico, it is surrounded my turquoise waters, white sandy beaches and the best shells in the world! It's just south of Sanibel Island, a well known shelling destination. This is where I find the seashells for all my crafts, I have more than I know what to do with! Marco Shell & Craft Co. is an amazing little store located on the island. It has a vast assortment of crafting supplies that I use for my projects and they feature completed crafts around the store that I use for inspiration!


Sea shells, sand dollars and starfish from the Gulf
Treasures from a shelling expedition


In March, on Spring Break, we took The Dolphin Explorer for a swing around the island. Not only did we see over 20 dolphins, we also made a pit stop on a remote barrier island, only accessible by boat. Resulting in a bounty of shells that have not been picked over by beach-goers! Since it is located near deeper waters, this shelling destination is a great opportunity to discover deep-sea shells, which may not make it all the way to the shores of mainland beaches. We found a rare "flat", zigzag scallop!


Shelling on the Gulf Coast of Southwest Florida
Holding my complimentary netted, shelling bag
Shelling on the Gulf Coast of Southwest Florida
Proper shelling posture :)